Delicious Discoveries Mastering the Art of Canned Cabbage
Canned cabbage might not sound like the centerpiece of a culinary competition, but a few years ago, it became the star of a friendly sauerkraut showdown between my husband and me. This contest wasn’t just about bragging rights; it was about reviving and reimagining a family tradition with our own twists. While I stuck to the old-fashioned method using a crock, reminiscent of Grandma’s way, my husband opted for a modern approach, processing his sauerkraut in jars.
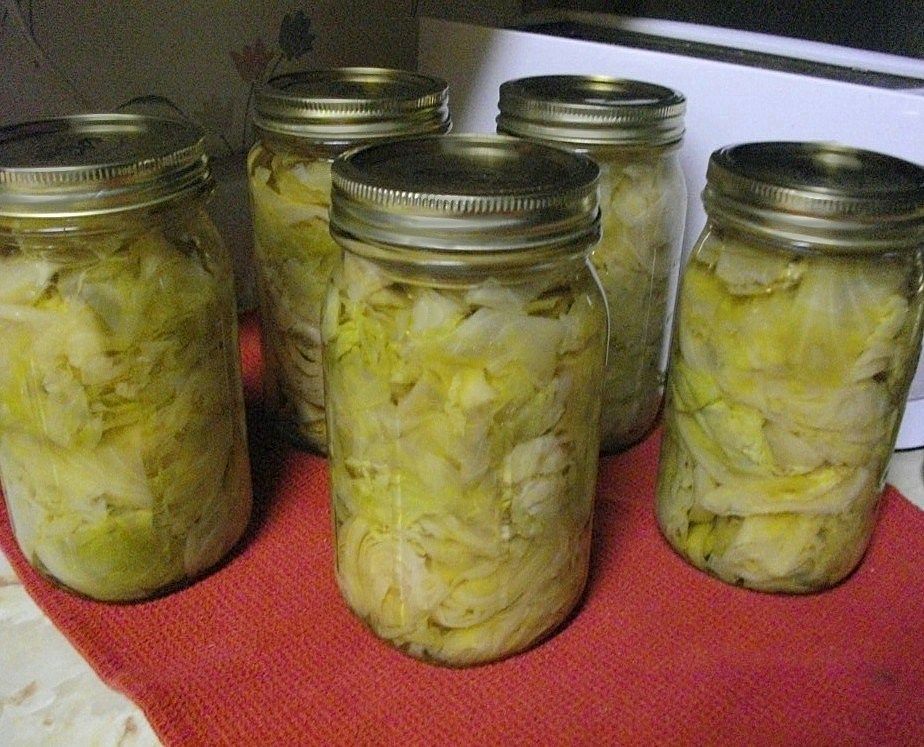
The outcome was an enlightening culinary experience. Alongside the expected success of the traditional sauerkraut that echoed generations of family recipes, we discovered an unexpectedly delightful recipe for canned cabbage. This new recipe didn’t just preserve the crisp, tangy essence of the cabbage—it enhanced it, resulting in a versatile, shelf-stable product that could be enjoyed in various dishes throughout the year.
The process of canning cabbage is straightforward yet requires attention to detail to ensure both safety and flavor. Starting with fresh, firm heads of cabbage, each averaging enough to fill about three quarts once shredded and packed, the key is in the preparation. Shredding the cabbage uniformly and packing it into sterile jars to just the right density ensures that each bite is perfectly preserved.
To each jar, a precise blend of sugar, canning salt, and vinegar is added. These ingredients not only contribute to the preservation process but also enhance the natural flavors of the cabbage, creating a balance of sweetness, saltiness, and acidity that is both refreshing and comforting. Filling the jars with boiling water and then securing them with hot lids and rings sets the stage for the final step: the water bath.
The water bath method, lasting a precise 20 minutes, is critical for sealing the jars and ensuring that the cabbage is safely preserved. This step locks in the flavors and extends the shelf life of the cabbage, making it a pantry staple that can be enjoyed in various ways. Whether fried, added to soup, or simply warmed up, this canned cabbage brings a touch of homemade goodness to every meal.
Reflecting on this culinary adventure, it’s clear that what began as a simple competition evolved into a journey of discovery and creativity. The canned cabbage recipe not only pays homage to traditional methods but also embraces innovation, offering a delightful twist on a classic.
| Event | Sauerkraut showdown between the author and their husband |
|---|---|
| Methods | Author used a traditional crock method; husband used a modern jar method |
| Outcome | Success of traditional sauerkraut and discovery of a delightful canned cabbage recipe |
| Canned Cabbage Process | Shredding cabbage, packing in sterile jars, adding sugar, canning salt, vinegar, and water bath for 20 minutes |
| Benefits | Preserves the crisp, tangy essence of cabbage; enhances flavors; versatile and shelf-stable |
| Reflection | A journey of discovery and creativity, blending tradition with innovation |
Contents
The Cabbage Canning Competition
The adventure began as a lighthearted challenge between my husband and me: who could create the best sauerkraut using different methods. My approach was steeped in tradition, utilizing an old-fashioned crock, much like the ones our grandmothers used. This method involves layering shredded cabbage with salt and then allowing it to ferment naturally over weeks. The crock method is known for its ability to develop deep, tangy flavors slowly, as the natural fermentation process unfolds at its own pace.
On the other hand, my husband decided to explore a more contemporary approach by using jars and a canning process. His method involved directly packing shredded cabbage into sterile jars, then adding a mix of sugar, salt, and vinegar, followed by boiling water. This approach was quicker, aiming to preserve the cabbage through heat and acidity rather than natural fermentation.

Our initial expectations were mixed. I was confident that the depth of flavor from the traditional method would be unbeatable, while my husband believed his method would not only be efficient but also yield a crisp and vibrant product. The competition was not just about taste but also about exploring how different techniques could influence the final product.
As the weeks passed and the results came in, we were both surprised. The traditional sauerkraut was as flavorful and rich as expected, with a complexity that only time can imbue. However, the revelation came with the discovery of the canned cabbage recipe. The jars of cabbage my husband prepared didn’t turn into traditional sauerkraut but instead became something uniquely delightful. The cabbage retained its crispness and absorbed the sweet, salty, and tangy flavors from the added ingredients. This new creation opened our eyes to the possibilities of canning as a method not just for preservation but for creating new flavors.
| Event | Lighthearted sauerkraut challenge between the author and their husband using different methods |
|---|---|
| Author’s Method | Traditional approach using an old-fashioned crock, natural fermentation over weeks |
| Husband’s Method | Modern approach using jars, adding sugar, salt, vinegar, and boiling water for quick preservation |
| Expectations | Author confident in depth of flavor from tradition; Husband optimistic about efficiency and vibrant flavor |
| Results | Traditional sauerkraut rich and complex; Canned cabbage crisp and absorbed sweet, salty, tangy flavors |
| Discovery | New possibilities of canning to create unique flavors beyond preservation |
Ingredients and Equipment Needed
To replicate the success of our canned cabbage recipe, you will need the following ingredients:
Cabbage: Fresh, firm heads of cabbage are essential. Depending on the size, one head typically yields about three quarts of shredded cabbage.
Sugar: Adds a mild sweetness that balances the tanginess of the vinegar and the saltiness of the canning salt.
Canning Salt: This is different from regular table salt as it doesn’t contain iodine or anti-caking agents, which can affect the clarity and taste of the final product.
Vinegar: Provides the necessary acidity that not only flavors the cabbage but also plays a crucial role in preserving it.
Water: Boiling water is used to fill the jars and ensure that the cabbage is submerged and ready for the canning process.
For the equipment, the following items are necessary to ensure a safe and effective canning process:
Sterile Jars: These are crucial for preventing contamination and ensuring that your canned cabbage is safe to eat. Ensure the jars are clean and free from any chips or cracks.
Lids and Rings: The lids seal the jars, and the rings hold the lids in place during the canning process. It’s important to use new lids each time to guarantee a proper seal.
Large Pot for Water Bath: This is used for the water bath process, where the filled jars are submerged in boiling water for a specific amount of time to ensure they are properly sealed and sterilized.
Wooden Spoon: A sturdy wooden spoon is essential for packing the cabbage tightly into the jars and for removing air bubbles before sealing them.
With the right ingredients and equipment at hand, you are well-prepared to embark on your own canning journey, creating jars of delicious, homemade canned cabbage that can be enjoyed in various ways throughout the year. This process not only preserves the fresh flavors of cabbage but also brings a sense of accomplishment and delight in each jar opened and served.
| Category | Details |
|---|---|
| Ingredients |
|
| Equipment |
|
Preparation Steps
Shredding the Cabbage: The journey to creating delicious canned cabbage begins with properly shredding the cabbage. Start by removing any wilted outer leaves and washing the cabbage thoroughly under cold water. Cut the cabbage into quarters, removing the hard core from each piece. Use a sharp knife or a mandoline slicer to cut the cabbage into thin, uniform strips. This consistency is crucial as it ensures even packing and preservation in the jars. Keep the shreds no thicker than a quarter-inch to allow flavors to penetrate fully during the canning process.
Packing the Jars: Sterilize your jars by boiling them in water for at least 10 minutes or using a dishwasher with a sterilize cycle. With sterile jars ready, begin packing the shredded cabbage. Using your hands or a wooden spoon, firmly pack the cabbage into each jar, leaving 1 inch of headspace at the top. This space is essential to allow for expansion during the canning process and to ensure a proper seal. As you pack, use the wooden spoon to press down the cabbage, eliminating air pockets which can affect the preservation quality.
Adding Ingredients: Once the jars are packed with cabbage, it’s time to add the flavoring components. To each jar, add 1 teaspoon of sugar, 1 teaspoon of canning salt, and 1 teaspoon of vinegar. This combination not only enhances the taste but also assists in the preservation process by creating an environment unfriendly to bacteria. Ensure that these ingredients are evenly distributed over the top of the cabbage to guarantee consistent flavor throughout.
Filling with Water: Carefully pour boiling water into each jar, filling it up to the neck but maintaining the 1-inch headspace. The boiling water will cook the cabbage slightly, ensuring it softens and allowing the flavors to meld. Use a clean cloth to wipe any spills or drips off the jar rims to prevent any sealing issues.
Sealing the Jars: Place the sterilized lids on each jar and secure them with the rings. Tighten the rings firmly but do not over-tighten; the jars need to release air during the canning process to form a vacuum seal. Ensure that the lids are centered and the rings are evenly screwed on to prevent leakage or uneven sealing.
| Step | Details |
|---|---|
| Shredding the Cabbage | Remove wilted leaves, wash under cold water, quarter the cabbage and remove the core, and shred into uniform strips no thicker than a quarter-inch. |
| Packing the Jars | Sterilize jars and pack shredded cabbage tightly, leaving 1 inch of headspace. Use a wooden spoon to eliminate air pockets. |
| Adding Ingredients | Add 1 teaspoon each of sugar, canning salt, and vinegar to each jar. Distribute evenly over the cabbage. |
| Filling with Water | Pour boiling water into each jar, maintaining 1-inch headspace. Wipe any spills off the jar rims. |
| Sealing the Jars | Place sterilized lids and secure with rings. Tighten firmly but not too tightly to allow air release and vacuum seal formation. |
Canning Process
The water bath canning process is essential for preserving your canned cabbage safely and effectively. Start by preparing a large pot with enough water to cover the jars by at least 1 inch. Bring the water to a simmer before carefully placing the filled jars into the pot using a jar lifter or tongs. Ensure the jars do not touch each other or the sides of the pot to prevent breakage.
Once the jars are in place, increase the heat to bring the water to a rolling boil. Cover the pot and maintain a steady boil for 20 minutes. This boiling process is crucial as it sterilizes the contents of the jars and ensures the formation of a vacuum seal as the jars cool down. The heat also activates the vinegar, salt, and sugar, melding the flavors and ensuring the cabbage remains preserved.
Safety Tips and Common Mistakes
Ensure Consistent Head Space: Maintaining the recommended 1-inch headspace in each jar is vital for proper sealing. Too little or too much space can lead to sealing failures or overflows.
Avoid Cross-Contamination: Use clean and sterilized equipment throughout the process. Any bacteria introduced during packing can spoil the contents.
Check for Cracks: Before starting, inspect each jar for cracks or chips. Damaged jars can break during the canning process.
Properly Tighten Rings: While the rings should be firm to hold the lids in place, over-tightening can prevent air from escaping, leading to jar breakage or improper sealing.
Monitor Water Levels: Ensure the water covers the jars by at least 1 inch throughout the boiling process. Low water levels can result in uneven heating and potential spoilage.
By following these steps and observing safety precautions, you’ll create beautifully preserved jars of canned cabbage that are perfect for a variety of dishes, offering a taste of homemade preservation at its best.
| Step/Tip | Details |
|---|---|
| Water Bath Canning Process | Prepare a large pot with enough water to cover jars by 1 inch. Bring to simmer, place jars using a jar lifter or tongs, ensure no contact between jars or pot sides, bring to a rolling boil, cover, and boil for 20 minutes to sterilize and seal jars. |
| Ensure Consistent Head Space | Maintain 1-inch headspace in each jar for proper sealing and to prevent overflows. |
| Avoid Cross-Contamination | Use clean and sterilized equipment to prevent spoilage from bacteria. |
| Check for Cracks | Inspect each jar for cracks or chips to avoid breakage during the canning process. |
| Properly Tighten Rings | Firmly secure rings to hold lids in place but avoid over-tightening to allow air escape and proper sealing. |
| Monitor Water Levels | Ensure water covers jars by at least 1 inch throughout boiling to avoid uneven heating and potential spoilage. |
Serving and Enjoying Canned Cabbage
Once your jars of canned cabbage are cooled and sealed, the excitement of using them in various dishes begins. This preserved cabbage is incredibly versatile and can add depth and flavor to many meals.
Fried Canned Cabbage: One of the simplest and most delightful ways to enjoy canned cabbage is by frying it. Heat a skillet over medium heat, add a bit of oil or butter, and then pour in the drained cabbage. Fry until it is lightly browned and caramelized. For an extra burst of flavor, add diced onions, garlic, and a sprinkle of your favorite herbs like thyme or dill. This method transforms the cabbage into a savory side dish that pairs wonderfully with grilled meats or mashed potatoes.

Canned Cabbage in Soups: Canned cabbage is a hearty addition to soups. Its tender texture and rich flavor enhance broth-based soups like chicken noodle or minestrone. Simply add the cabbage during the last few minutes of cooking to maintain its texture and flavor. For a more robust option, incorporate it into a creamy potato or sausage soup, where it will meld seamlessly with the other ingredients.
Simply Warmed Up: On busy nights, the simplicity of just warming up canned cabbage can be a lifesaver. Drain the cabbage and heat it in a saucepan with a bit of butter or olive oil. Season with salt and pepper, and if you like a little acidity, a splash of apple cider vinegar. This quick and easy preparation makes it a perfect last-minute addition to any meal, offering comfort and flavor with minimal effort.
| Dish | Preparation Details |
|---|---|
| Fried Canned Cabbage | Heat a skillet with oil or butter, add drained cabbage, and fry until browned and caramelized. Enhance with onions, garlic, and herbs like thyme or dill for extra flavor. Pairs well with grilled meats or mashed potatoes. |
| Canned Cabbage in Soups | Add to broth-based soups like chicken noodle or minestrone in the last minutes of cooking. For creamier soups, mix with potato or sausage for a robust flavor. |
| Simply Warmed Up | Warm drained cabbage in a saucepan with butter or olive oil, season with salt, pepper, and optionally, apple cider vinegar. A quick, comforting addition to any meal. |
Personal Anecdotes and Flavor Enhancements
From my own kitchen adventures, I’ve discovered that the key to elevating canned cabbage lies in the balance of flavors. One of my favorite ways to serve it is to enhance its natural sweetness with a touch of honey or brown sugar during the frying process. This creates a beautiful glaze that is irresistible.
Another tip is to add a bit of crunch. Sprinkling toasted sesame seeds or crushed nuts over the top of the warmed cabbage adds texture and a nutty flavor that contrasts beautifully with the soft cabbage.
During one memorable family dinner, I mixed the canned cabbage with sautéed apples and onions, creating a dish that was both unexpected and thoroughly enjoyed. The sweetness of the apples and the sharpness of the onions brought out the best in the cabbage, making it a dish that my family still talks about.
| Enhancement | Description |
|---|---|
| Sweetening the Cabbage | Add honey or brown sugar during the frying process to enhance the natural sweetness of the cabbage, creating a beautiful glaze. |
| Adding Crunch | Sprinkle toasted sesame seeds or crushed nuts over warmed cabbage for texture and a contrasting nutty flavor. |
| Mixing with Apples and Onions | Sauté canned cabbage with apples and onions to create a dish with sweetness from apples and sharpness from onions, making a memorable family meal. |
Reflecting on the journey of creating and enjoying homemade canned cabbage, it’s clear that this simple ingredient can be transformed into a star element of many meals. Its versatility extends from hearty winter soups to light, crispy sides for summer barbecues. The process of canning, while rooted in tradition, is also an avenue for creativity and personal expression in the kitchen.
I encourage you to try this recipe and see for yourself how satisfying and rewarding home canning can be. Whether you’re a seasoned canner or a newcomer to this age-old method, the act of preserving food is a connection to the past and a step towards sustainable, wholesome eating.
So, embrace the joys of home canning, experiment with flavors and textures, and most importantly, share the delicious results with those you love. Your canned cabbage is not just a jar of preserved vegetables; it’s a jar full of possibilities waiting to be explored and enjoyed.
Cabbage -Benefits of Cabbage Fufu A Keto Alternative to Traditional
Unlocking the Power of Cabbage for Weight Loss Your Complete Guide
Delicious Baked Red Cabbage with Apple A Versatile Side Dish
Traditional German Red Cabbage A Sweet and Sour Delight
Sweet Red Cabbage for Roast The Ultimate Game Changer
Traditional Danish Red Cabbage A Classic Recipe for Your Table
Sweet and Sour Red Cabbage A Traditional Delight